Setting up Saved Replies
If you work in customer support, you've probably encountered a time when multiple people were asking the same question.
For example, when we launched DoneDone 2, we received a lot of questions about how to switch from a Classic account over to DoneDone 2.
In the spirit of increasing efficiency, we created Saved Replies for those times when you need to respond to your customers' most frequently asked questions. Here’s how to use them.
Create your saved reply
First things first, you need to create a saved reply. Go to the Email Signature settings section within your Mailbox.

Note that saved replies will only be saved to the Mailbox you create them in. To create a saved reply for a different Mailbox, you'll need to click into that Mailbox and repeat the steps listed below.
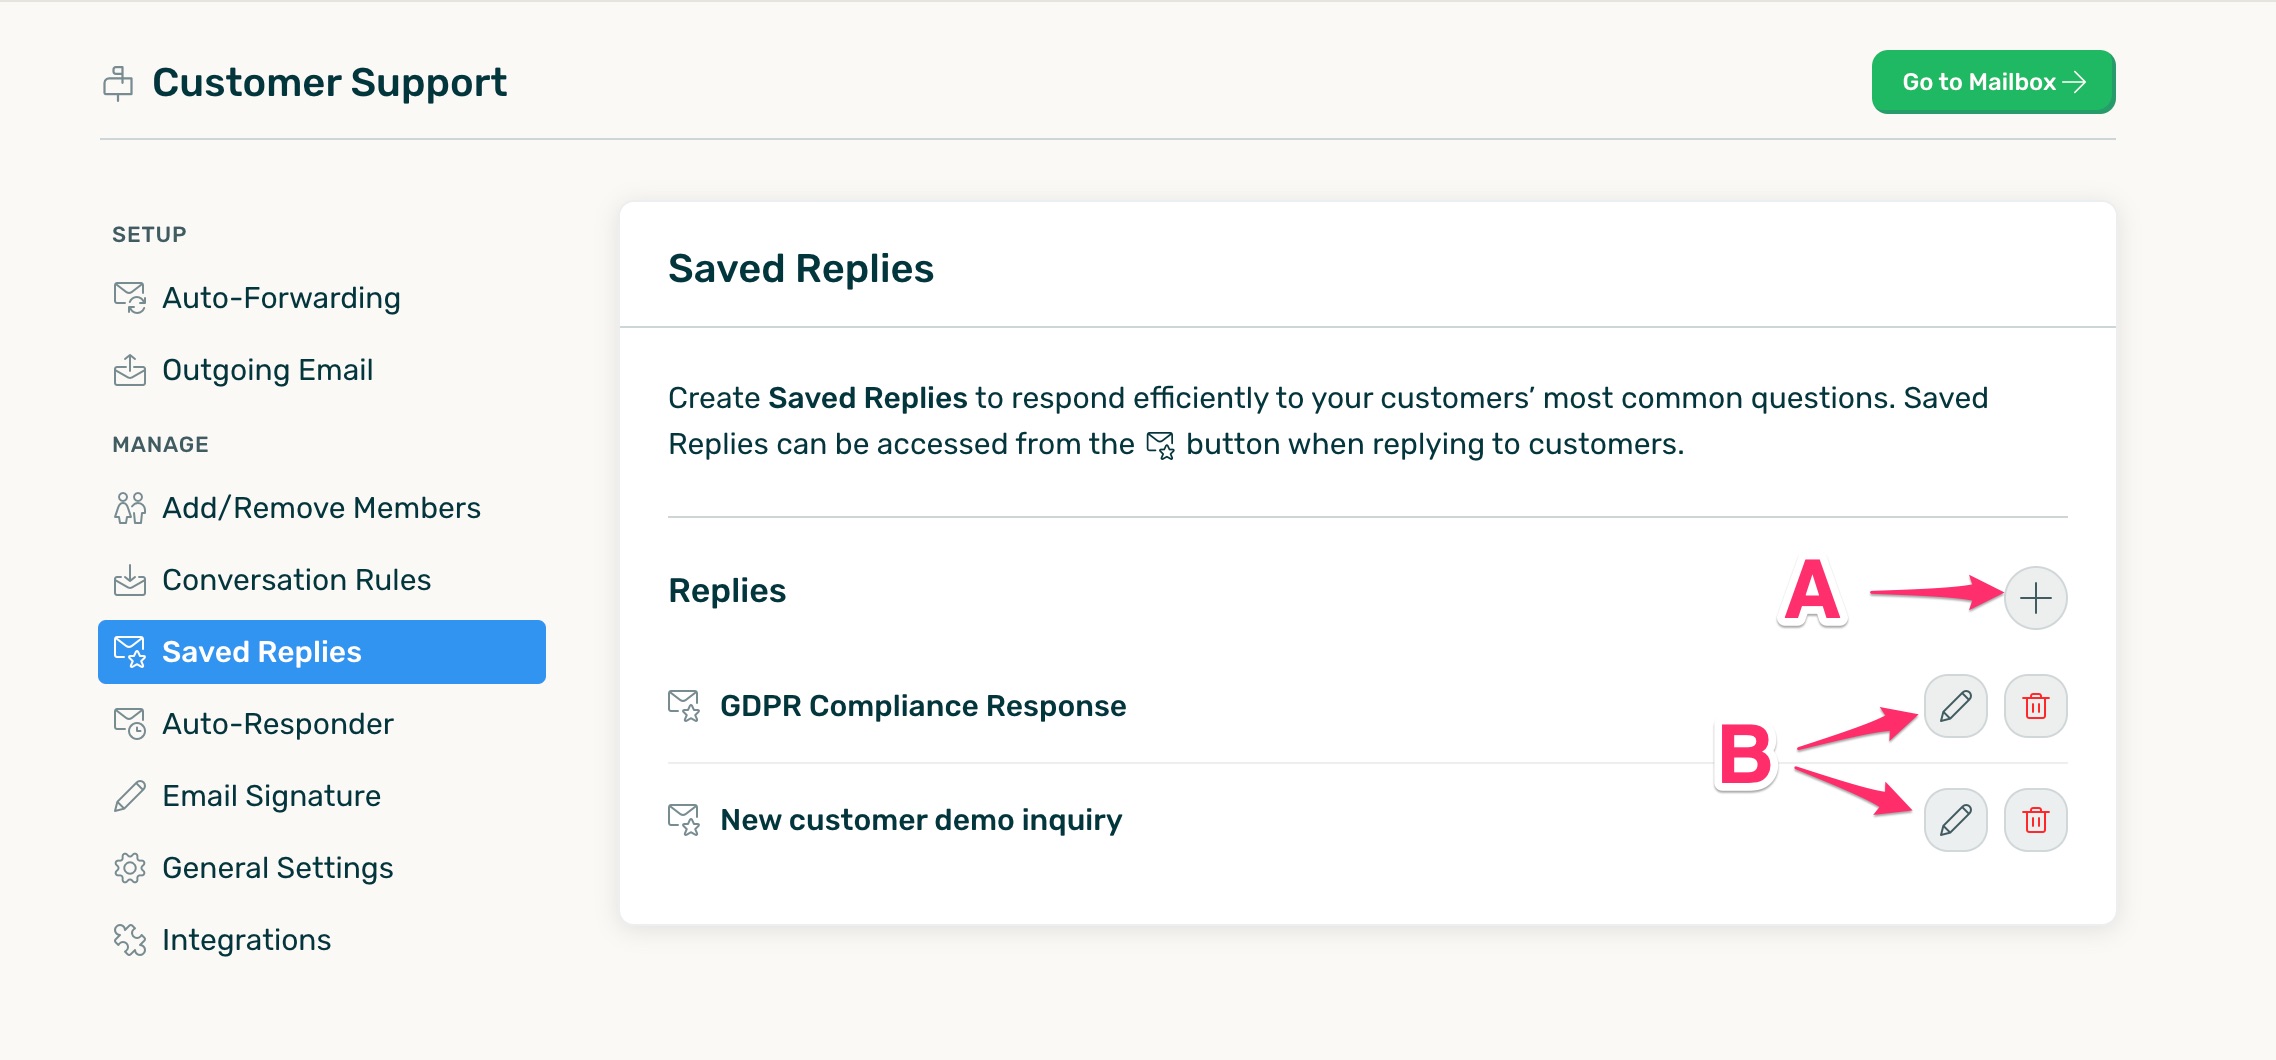
From here, you'll have the ability to create a new saved reply or edit an existing one.
- A: To create a new reply, click on +.
- B: To edit a saved reply, click on the edit icon next to the reply you'd like to edit and make your changes from there.
- You can also delete a saved reply from here by selecting the red trash icon next to the reply you'd like to delete.
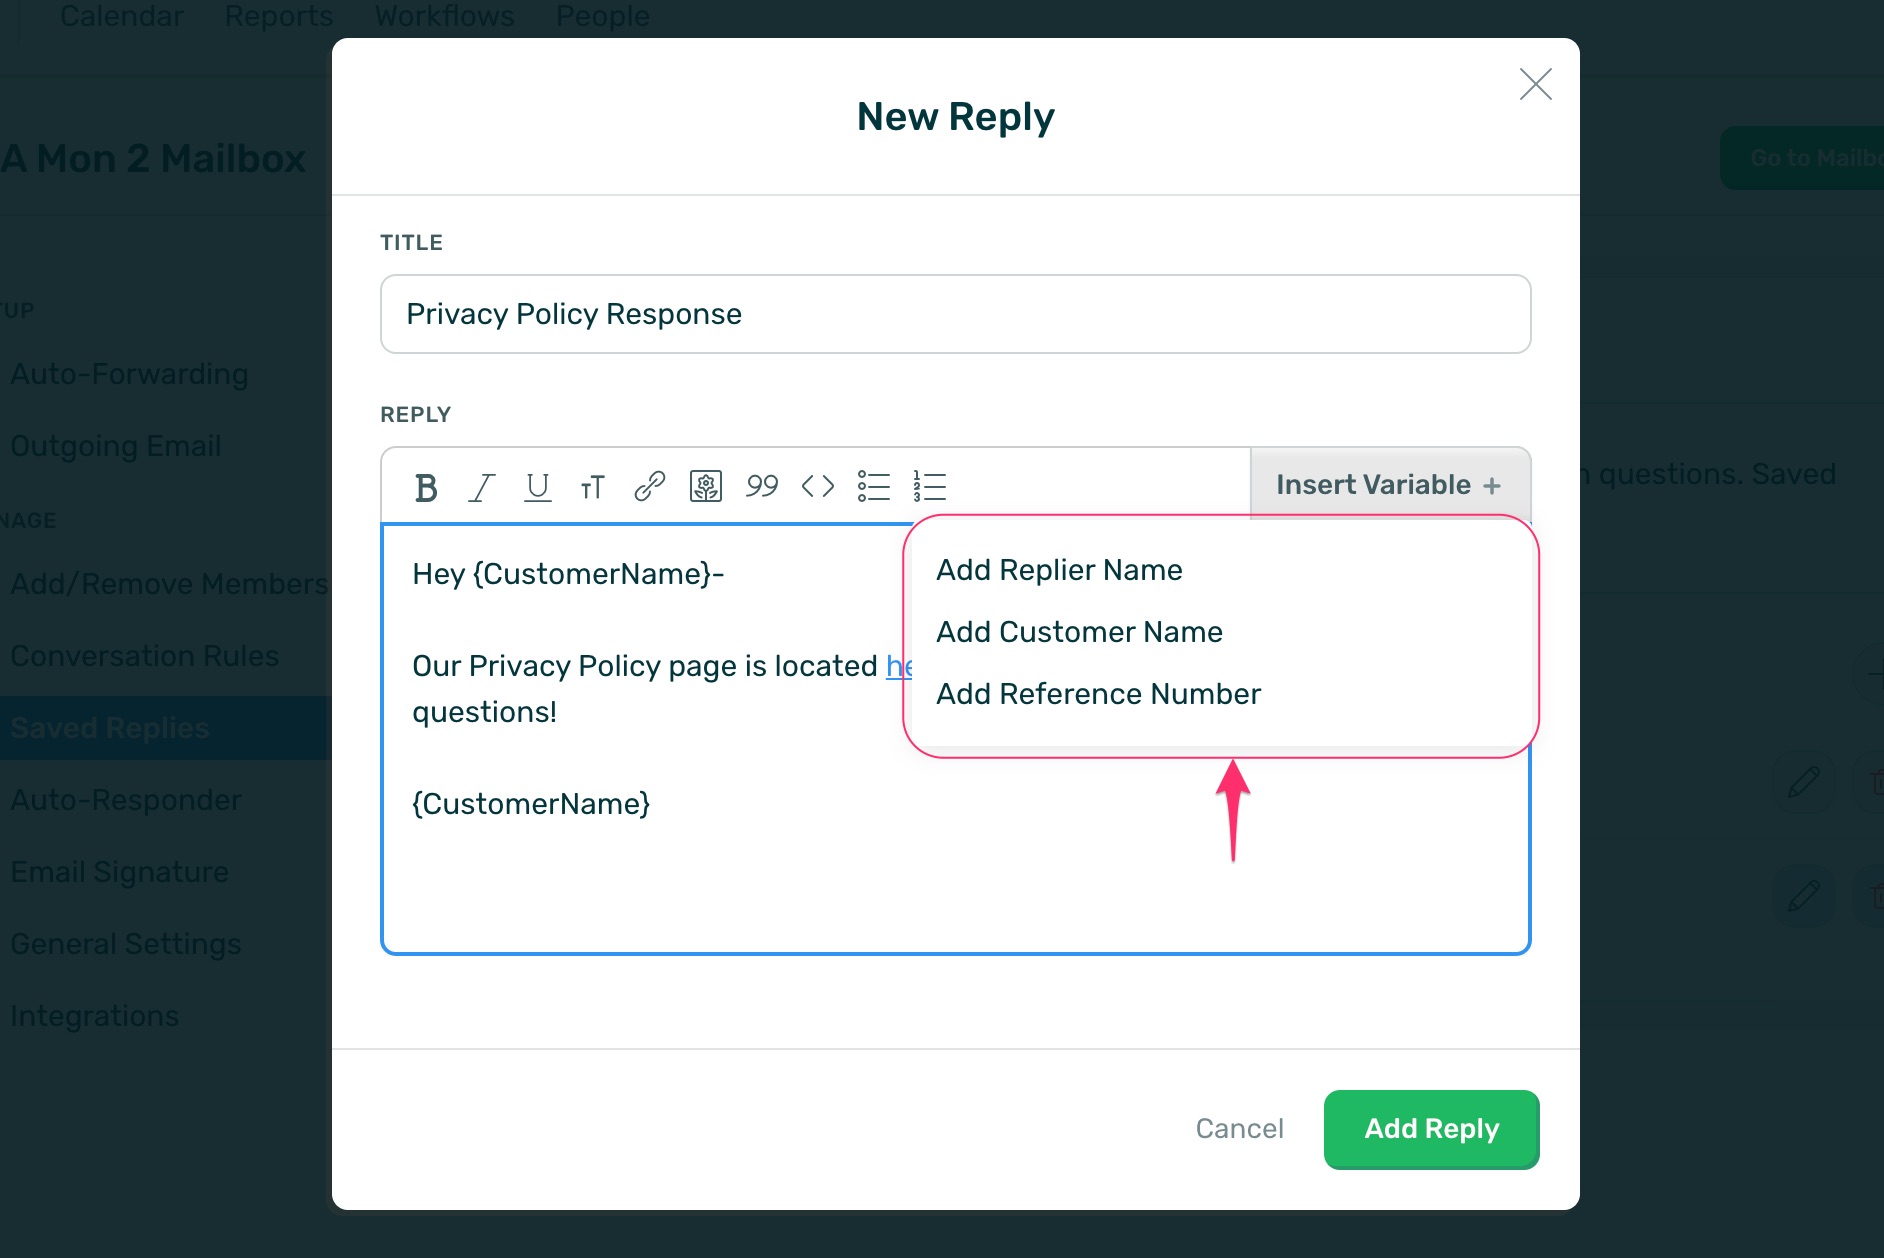
When you create a new saved reply, you have a couple of options to customize your message. For starters, you can title the reply for easy identification. You can add links, attachments, and quotes.
DoneDone currently provides three other variables you can use within your reply:
- Replier Name - This will be replaced by the full name of the support person replying to the customer.
- Customer Name - This will be replaced by the full name of the customer when the auto-reply is sent back to them. The customer name is derived from the name provided in their original email sent to DoneDone.
- Reference Number - This will be replaced by the Conversation # when the auto-reply is sent back to them. A customer does not need to know the conversation # (as all correspondences are sent as regular email to them). However, if you provide phone support as well, having the reference number at hand will help your customer and phone support staff more quickly find the original email conversation.
Once you finish crafting your message, make sure to hit Add Reply, then Save Changes, and you're ready to go!
Using your saved replies
Once you've created a saved reply, you're ready to put it into action. Read on for what to do when the next commonly asked question comes in.
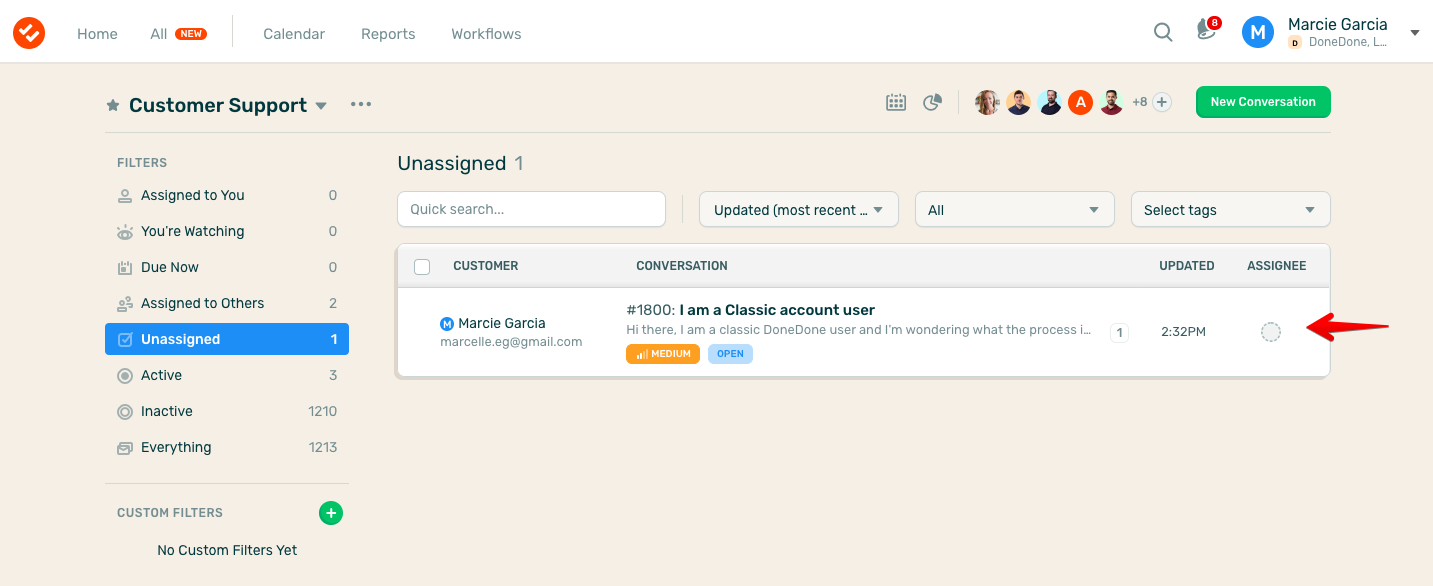
From your Mailbox, click on the conversation you'd like to respond to.
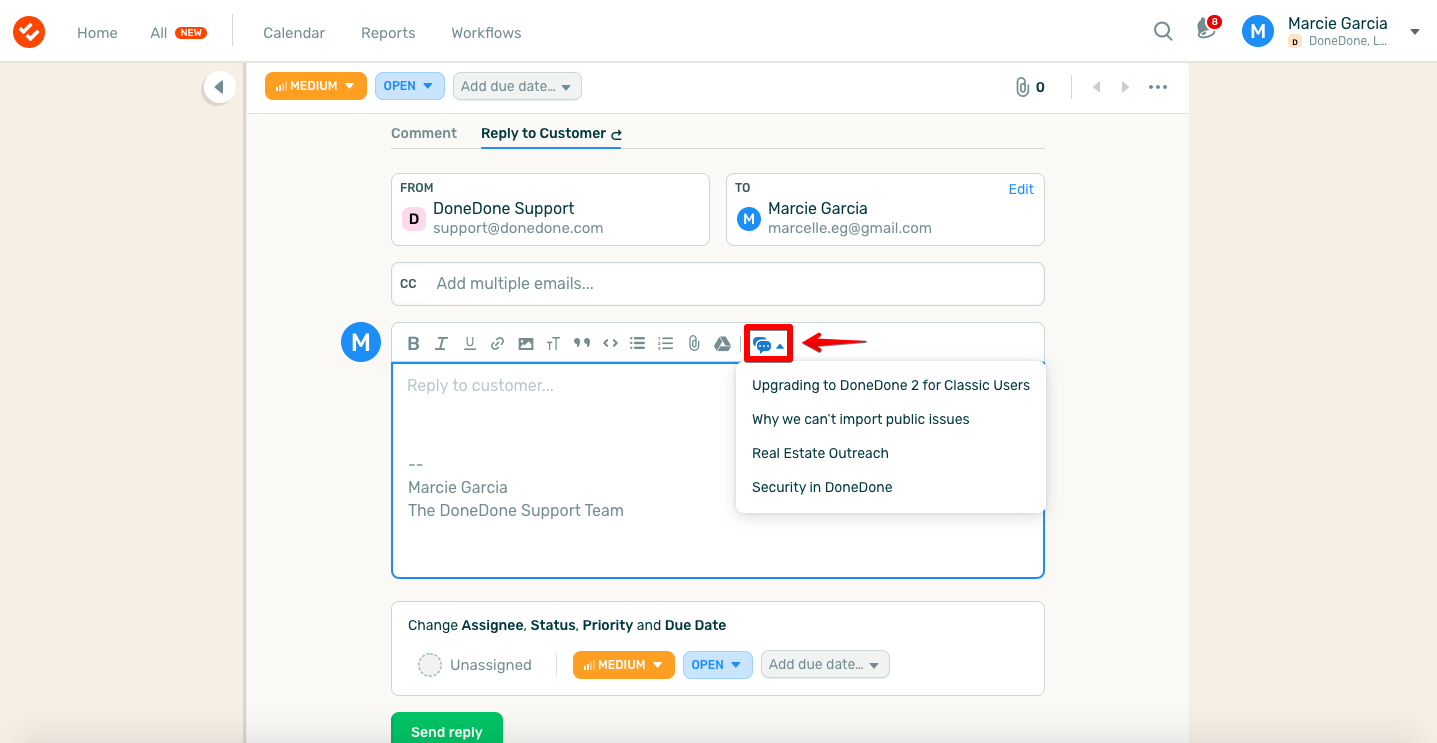
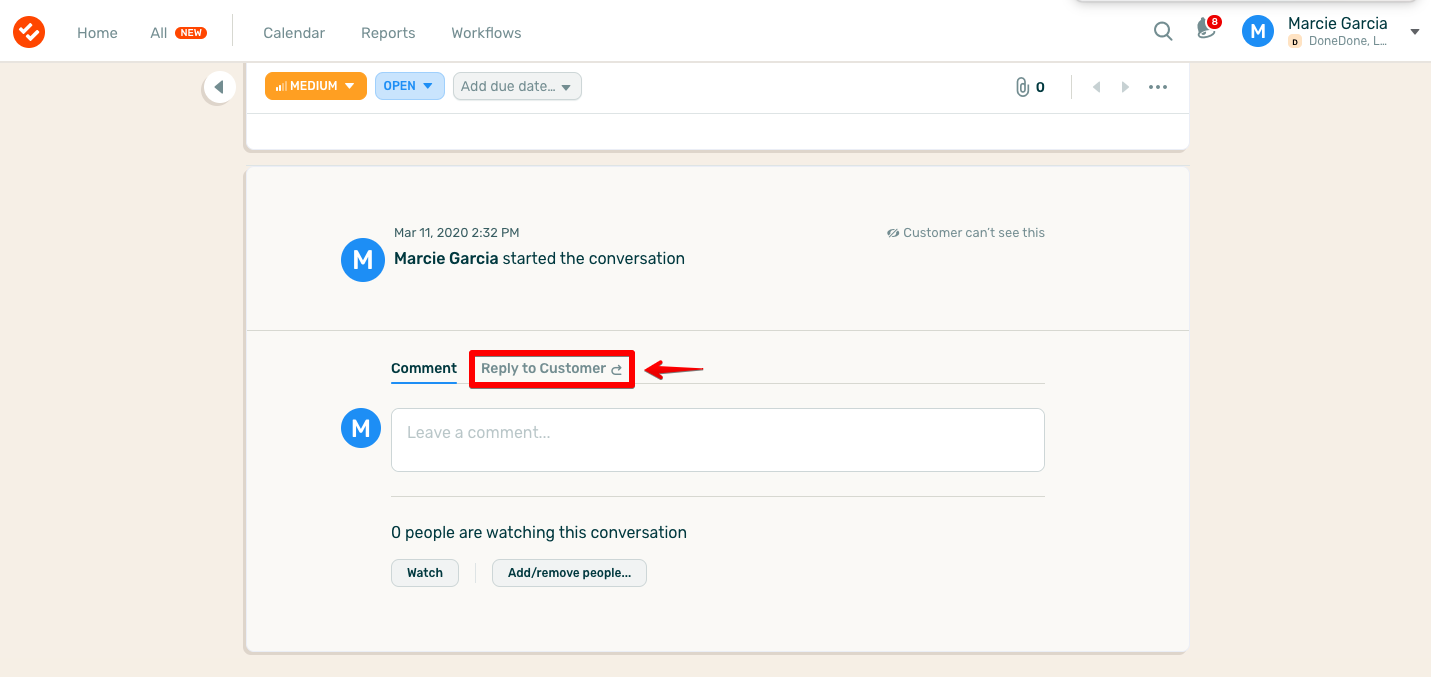
Once you click on the conversation, scroll down to the bottom of the page to the comment box and click Reply to Customer.
From there, click on the saved reply icon on the right side of the tool panel, which will reveal a drop-down menu of the saved replies for that Mailbox. Simply select the saved reply you'd like to use, hit send, and voila! You're ready to respond to your customers professionally and in half the time.